
today_is
[ websocket ] 메모장 본문
오늘의 목표
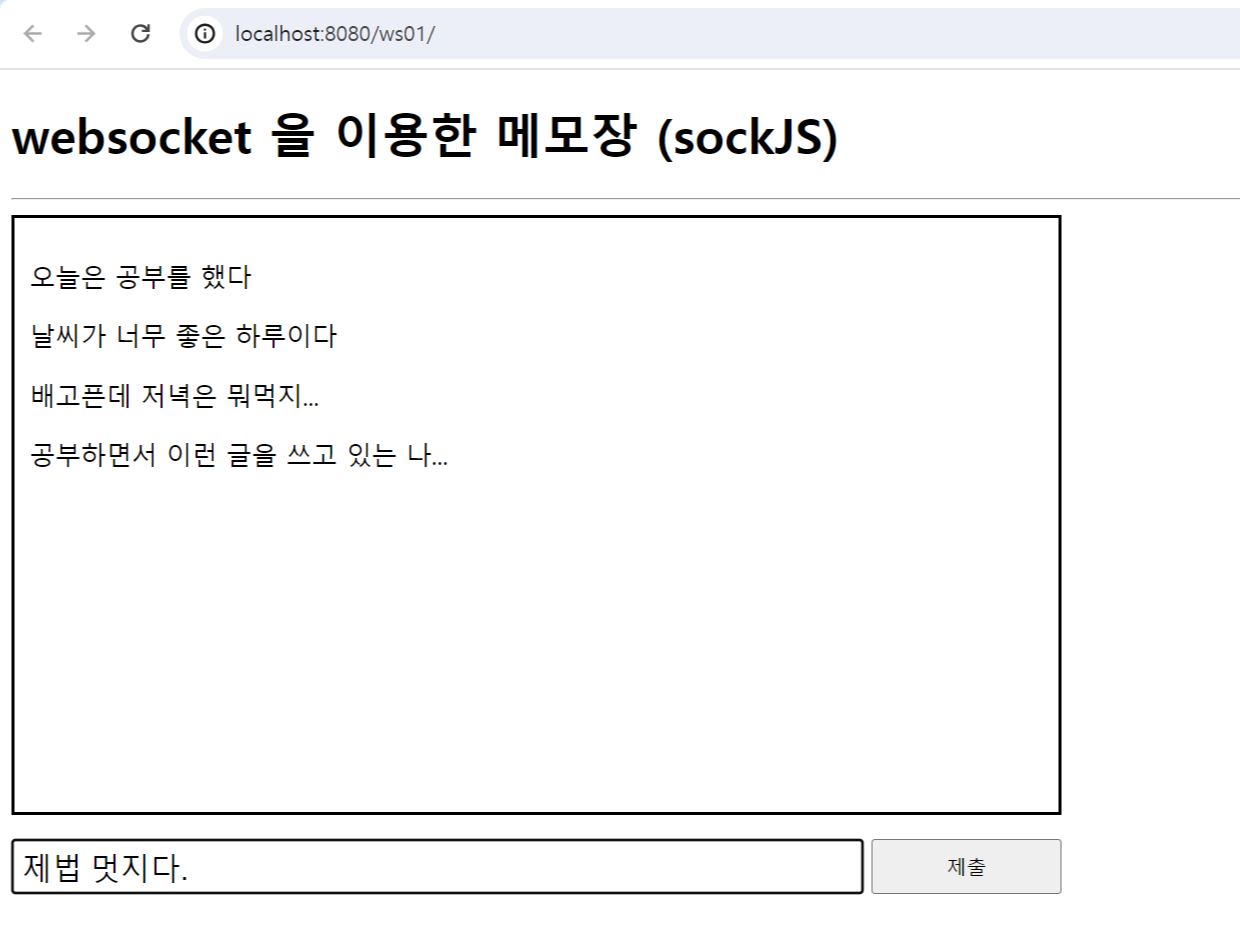
웹소켓으로 간단한 메모장을 만들어보자
Ajax 와 Web socket 의 차이
: 연결의 지속성에 따라 둘을 구분한다
클라이언트와 서버가 통신할 때 HTTP 통신을 주로 사용한다.
HTTP 통신은 다음과 같은 특징이 있다.
- 비연결성 (connectionless) : 연결을 맺고 요청을 하고 응답을 받으면 연결을 끊어버린다.
- 무상태성 (stateless) : 서버가 클라이언트의 상태를 가지고 있지 않는다.
- 단방향 통신이다.
이러한 HTTP 통신의 경우 채팅과 같은 실시간 통신에 적합하지 않다.
물론 HTTP 통신으로 실시간 통신을 흉내낼 수는 있으나 완벽하지는 않다.
실시간 통신이 필요할 때 사용하는 통신을 소켓 통신이라고 한다.
HTTP 통신과 다르게 연결을 맺고 바로 끊어버리는 게 아니라 계속 유지를 하기 때문에 실시간 통신에 적합하다.
Ajax
자바스크립트를 이용해 서버와 브라우저가 비동기 방식으로 데이터를 교환할 수 있는 통신기능
데이터를 '주고 받는' 형식
요청과 응답이 존재
HTTP을 이용한 요청과 응답
클라이언트의 요청이 없으면 서버의 응답도 없다
Web socket
사용자의 브라우저와 서버 사이의 인터액티브 통신 세션을 설정할 수 있게 하는 고급 기술
클라이언트의 요청이 없어도 서버의 응답이 존재할 수 있음
웹소켓 연결을 끊어버리기 전까지는 자유롭게 요청, 응답이 오고갈 수 있다
home.jsp
<%@ page language="java" contentType="text/html; charset=UTF-8"
    pageEncoding="UTF-8"%>
<%@ taglib prefix="c" uri="http://java.sun.com/jsp/jstl/core" %>
<c:set var="cpath" value="${pageContext.request.contextPath }" />

<!DOCTYPE html>
<html>
<head>
<meta charset="UTF-8">
<title>Insert title here</title>

<script src="https://cdn.jsdelivr.net/sockjs/1/sockjs.min.js"></script>

<style>
	#notepad {
		box-sizing: border-box;
		width: 700px;
		height: 400px;
		padding: 10px;
		margin: 10px 0;
		border: 2px solid black;
		font-size: 17px;
		overflow-y: auto;
	}
	form > p {
		box-sizing: border-box;
		width: 700px;
		display: flex;
		justify-content: space-between;
	}
	input[name="input"] {
		padding: 5px;
		font-size: 20px;
		flex: 5;
		margin-right: 5px;
	}
	input[type="submit"] {
		flex: 1;
	}

</style>

</head>
<body>

<h1>websocket 을 이용한 메모장 (sockJS)</h1>
<hr>


<div id="notepad">
</div>

	<form>
		<p><input type="text" name="input" placeholder="글을 입력">
			<input type="submit">
		</p>

	</form>

<script>
	//	변수선언
	const cpath = '${cpath}'
	const form = document.forms[0]
	const ws = new SockJS(cpath + '/chat')
	const notepad = document.getElementById('notepad')


	//	함수정의
	function messageHandler(event) {
		notepad.innerHTML = '<p>' + event.data + '</p>'
		notepad.scroll({
			top : notepad.scrollHeight,
			behavior : 'smooth',
		})
	}

	function submitHandler(event) {
		event.preventDefault()
		const input = event.target.querySelector('input[name="input"]')


		ws.send(input.value)
		input.value = ''
		input.focus()
	}

	//	이벤트 연결
	ws.onmessage = messageHandler
	ws.onopen = function(msg) {}
	ws.onclose = function(msg) {}
	ws.onerror = function(msg) {}
	form.onsubmit = submitHandler


</script>


</body>
</html>
ChatComponent
package com.itbank.component;

import java.util.ArrayList;
import java.util.List;

import org.springframework.web.socket.CloseStatus;
import org.springframework.web.socket.TextMessage;
import org.springframework.web.socket.WebSocketSession;
import org.springframework.web.socket.handler.TextWebSocketHandler;

public class ChatComponent extends TextWebSocketHandler {


	List<WebSocketSession> sessionList = new ArrayList<>();


	//	저장 - source - Override/Implements method

	@Override	//	연결이 성립된 이후 실행되는 함수
	public void afterConnectionEstablished(WebSocketSession session) throws Exception {
		System.out.println("연결 생성 확인 : " + session);
		sessionList.add(session);
	}


	@Override	//	텍스트 메시지를 전달받았을 때 실행되는 함수
	protected void handleTextMessage(WebSocketSession session, TextMessage message) throws Exception {
		System.out.printf("메시지 받음 : [%s] : %s\n", session, message);

		for(WebSocketSession ws : sessionList) {	//	세션리스트에 들어가있는 모든 웹 소켓에게
			ws.sendMessage(message);		//	받은 메시지를 다시 보낸다 (== 클라이언트가 응답을 받았을 것이다)
		}
	}


	@Override	//	연결이 끊어졌을 때 실행되는 함수
	public void afterConnectionClosed(WebSocketSession session, CloseStatus status) throws Exception {
		System.out.println("연결 종료 : " + session);
		sessionList.remove(session);
	}

}
에러 기록하기 ( 콘솔 에러 )
만약 경로를 지정하지 않았다면 에러가 뜬다
GET http://localhost:8080/ws01/chat/info?t=1709514852080 404 (Not Found)
component 클래스에 경로 지정을 하자
[ 접속 이동 경로 살펴보기 ]
함수 작성 없이 먼저 연결부터 확인해보기
web.xml 에서 버전은 3.0 이상이어야한다 (web socket 지원여부)
1) home.jsp 에서 script 태그
const ws = new SockJS(cpath + '/chat')
2) chatComponent 에서
afterConnectionEstablished 가 작동하면
3) 콘솔창에서 연결확인 메시지가 뜬다
콘솔창 결과

결과
study_review
이번에는 혼자 메모장처럼 메시지를 남기는 실습을 연습했다
다음번엔 웹소켓을 이용한 채팅을 구현해볼 것이다!!
또한 스프링빈 등록이 제대로 되었는지 확인을 자주해야겠다.. (파일 옆에 S 가 떠있는지 확인!!)
가끔 스프링빈 등록이 안되어있을때도 있다.
그럴때마다 설정파일 내용을 전체 선택해서 새로 붙여넣기 하거나,
alt + F5 를 한번 더 해주는 중이다...
'spring' 카테고리의 다른 글
| [ mail ] 이메일 보내기 (0) | 2024.05.29 |
|---|---|
| [ websocket ] 채팅 (0) | 2024.03.04 |
| [ spring ] 다른 ip와 DB 내용 공유하기 (0) | 2024.03.03 |
| [ json ] HashMap 을 이용한 json 데이터 mapping (0) | 2024.02.04 |
| [ Exception ] 예외처리, 예외전가 (0) | 2024.01.30 |


